Notes On Palladium
A member of the platinum group metals, you’ll notice palladium exhibits platinum characteristics when soldering. It doesn’t need flux or a protective coating and also develops slight discoloration or light oxidation when soldering.
Traditional pickling methods won’t remove discoloration leading many jewelers to resort to abrasives or polishing compounds. The best and quickest method we recommend is using a neutral flame and brushing it over the discolored area. The discoloration vanishes in seconds. If by chance, you should have dark or black spots, this is when you’d want to place your palladium in the pickle solution.
Project Prep
Before you begin, here is list of items you’ll need to have on hand for the processes we are focusing on in this tutorial: Attaching 1601 and 23631 palladium earring posts to a standard 1874 palladium earring basket, and a SH2 palladium shank to a 309 palladium head.
- Ceramic Block (casting melting bowl)
- Ceramic tweezers
- No. 5 welding glasses
- Jewelers Shears
- Solder pick
- The same solders that are used for platinum alloys 1,000°C extra easy, 1,100°C easy, and 1,200 °C medium cadmium free platinum repair solders
Side Note: Solder ID: We like to take a pointed scribe and write in the four corners of the solder coupon the name and type of solder. As you chip away at the coupon you will always have the identification on your coupon!
- Natural gas or propane and oxygen for the fuel supply of choice
- Check that your components fit flush or tightly together, prior to soldering
- Clean your components in Ultra-CR soap, rinse your components in clean water, then steam
Project 1: Earring Post Assembly
When soldering the 1601 palladium post you may use 1,000°C or 1,100°C plat repair solder. For the 23631 palladium screw post, we recommend the 1,000°C solder. Due to the diameter in the thread location, the higher temperature tends to soften the post.
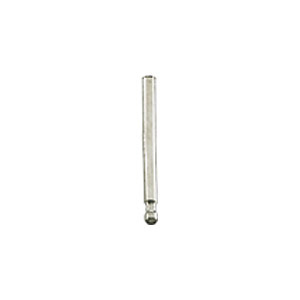
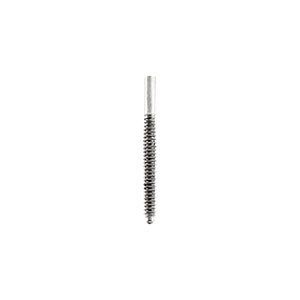 1601 post and 23631 screw post
Step 1: With your jeweler’s shears, chip approximately 0.8 mmx 0.8mm size solder chips from your coupon. One of these chips is sufficient to attach the earring post to the basket.
Step 2: Put on your safety glasses and set your torch flame a little more intense than a neutral flame
Step 3: Place your earring basket on your ceramic block.
Step 4: Grab your earring post with your ceramic tweezers.
Step 5: While the post is in your tweezers slightly heat up the lower area of the post and attach the palladium solder to the bottom.
Step 6: Now focus your torch flame on the basket while simultaneously brushing your flame over the bottom of the post, which is still not in its projected assembled location.
Step 7: Once components begin to turn slightly red, you may place the post onto its final location on the basket.
Step 8: Heat the two components in the solder location until you see the solder liquefy around the bottom of the post.
Step 9: Let the piece air cool.
Step 10: You will notice a slight oxidation mostly on the post, so use a neutral flame to brush over the discolored area and watch the oxidation disappear.
 Assembly Complete
Project 2: Solitaire Assembly
When soldering the SH2 palladium shank to the 309 palladium head we recommend the 1,100 °C solder due to the fact that 1,200 °C is used to solder the 309 palladium heads. This leaves you the ability to step solder down in temp with 1,000 °C if you should need to size the solitaire.
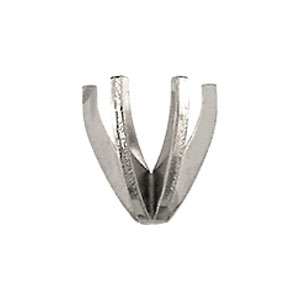
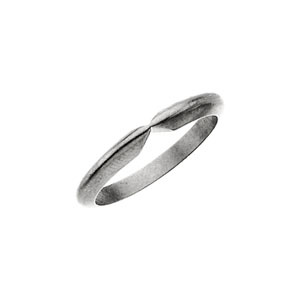 309 Head SH2 Shank
Step 1: With your jeweler’s shears, chip approximately 1.25mm x1.25mm size solder chips from your coupon. Use one chip on each side where attaching the shank to head.
Step 2: Place your 309 head into the opening of your SH2 shank, making sure to align everything properly.
Step 3: Place your solitaire so that the prong tips are on the ceramic solder block. This will help protect the prong tips from over heating.
Step 4: Put on your safety glasses and set your torch flame to an oxidizing flame for intensity.
Step 5: Using your solder pick, ball up your chip solder onto the point of your pick.
Step 6: Now focus your torch flame between the head and shank location. Palladium has low thermo conductivity so the heat will stay concentrated where the torch tip is
located.
Step 7: When the solder area gets to a red color, place your solder in the location and hold your heat until the solder has completely flowed.
Once the soldering is completed you will see that the piece has discolored in ranges from blue to violet.
Step 8: Set your torch flame to a neutral flame and brush your flame over the discolored location and watch it disappear!
Good luck and happy soldering!
As always, should you have any questions or find yourself in a jam, drop us an email, hit us up on Live Chat, or call us 1-800-877-7777 (Ext 4300): We’re here to help.
[Adapted from: Stuller Technical Resources and From the Bench Publication, April 2010]